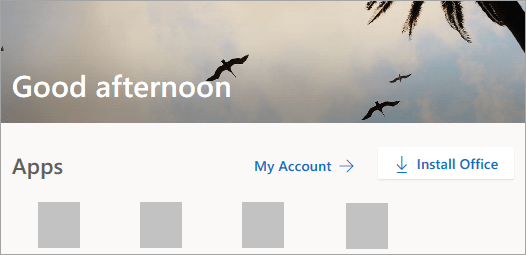
Sign in and install Office
- Go to www.office.com and if you're not already signed in, select Sign in.
Note: If you bought Office for personal use through your company's Microsoft HUP benefit, you may not be able to sign in here. Find installation help at Install Office through HUP.
- Sign in with the account you associated with this version of Office.
Tip: Depending how you got Office, this account can be a Microsoft account or work or school account. If you forgot your account details, see I forgot the account I use with Office.
- On the Office home page, do the following depending on your version of Office.
Select Install Office > Install if you signed in with a Microsoft account.
Select Install Office Apps > Office 2016 if you signed in with a work or school account. (Note: The link may say Office 2016, however Office will install the most up-to-date version of the Office apps as set by your Office 365 admin.)
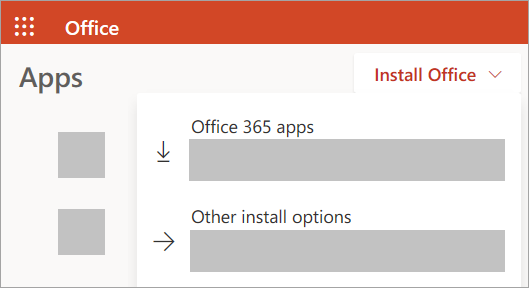
This begins the download of Office. Follow the prompts on your screen to complete the install.
Don't see an install option after signing in? There could be an issue with your account. Select
Need help?from above and review the issues listed in the section
Account questions.
Install Office
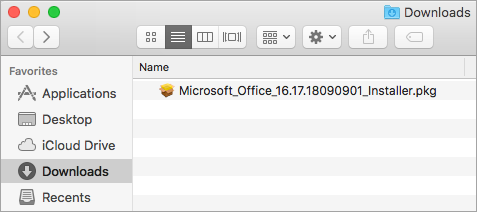
- Once the download has completed, open Finder, go to Downloads, and double-click Microsoft Office installer.pkg file (the name might vary slightly).
 Tip: If you see an error that says the Microsoft Office installer.pkg can't be opened because it is from an unidentified developer, wait 10 seconds and move the downloaded file to your desktop. Hold Control + click the file to launch the installer.
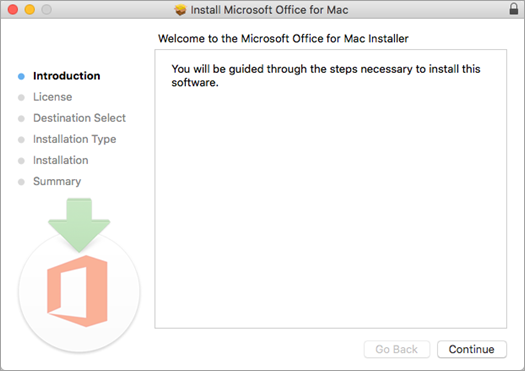
- On the first installation screen, select Continue to begin the installation process.
- Review the software license agreement, and then click Continue.
- Select Agree to agree to the terms of the software license agreement.
- Choose how you want to install Office and click Continue.
- Review the disk space requirements or change your install location, and then click Install.
Note: If you want to only install specific Office apps and not the entire suite, click the Customize button and uncheck the programs you don't want.
- Enter your Mac login password, if prompted, and then click Install Software. (This is the password that you use to log in to your Mac.)

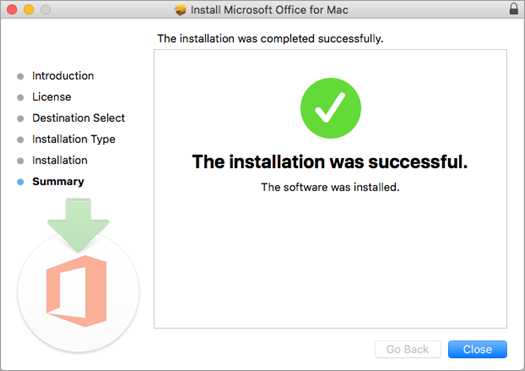
- The software begins to install. Click Close when the installation is finished. If Office installation fails, see What to try if you can't install or activate Office for Mac.
Launch an Office for Mac app and start the activation process
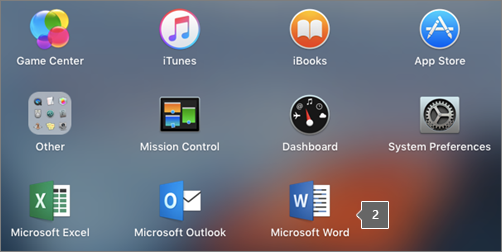
- Click the Launchpad icon in the Dock to display all of your apps.

- Click the Microsoft Word icon in the Launchpad.
- The What's New window opens automatically when you launch Word. Click Get Started to start activating. If you need help activating Office, see Activate Office for Mac. If Office activation fails, see What to try if you can't install or activate Office for Mac.

Installation notes
Installation notesHow do I pin the Office app icons to the dock?- Go to Finder > Applications and open the Office app you want.
- In the Dock, Control+click or right-click the app icon and choose Options > Keep in Dock.