Set up 2-step verification for Office 365
Once your admin enables your organization with 2-step verification (also called multi-factor authentication), you have to set up your account to use it.
By setting up 2-step verification, you add an extra layer of security to your Office 365 account. You sign in with your password (step 1) and a code sent to your phone (step 2).
- Check whether your Office 365admin has turned on multi-factor authentication for your account. If they haven't, when you try to do these steps you won't see the options in Office 365.
- Sign in to Office 365 with your work or school account with your password like you normally do. After you choose Sign in, you'll see this page:
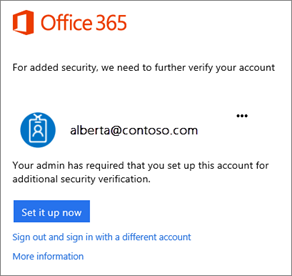
- Choose Set it up now.
- Select your authentication method and then follow the prompts on the page. Or, watch the video to learn more.
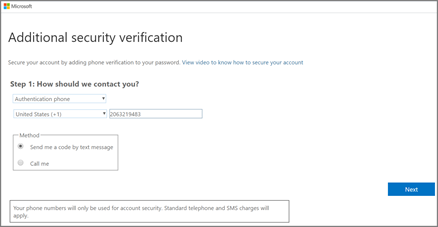
- After you verify your alternate contact method, choose Next.
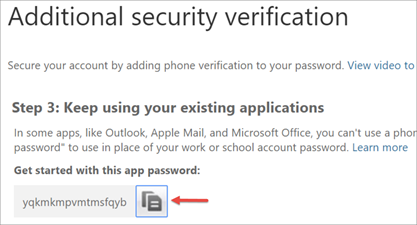
- You'll get an app password that you can use with Outlook, Apple Mail, etc. Choose the copy icon to copy the password to your clipboard. You won't need to memorize this password.
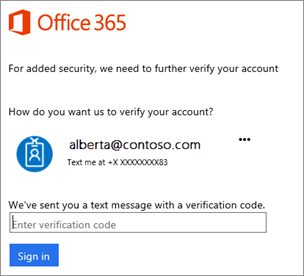
- Once you complete the instructions to specify how you want to receive your verification code, the next time you sign in to Office 365, you'll be prompted to enter the code that is sent to you by text message, phone call, etc.
To have a new code sent to you, press F5.
We strongly recommend setting up more than one verification method. For example, if you travel a lot, consider setting up Microsoft Authenticator for your verification method. It's the easiest verification method to use, and a way to avoid text or call charges.
Choose the mobile app
Open a browser on your computer and go to
portal.office.com. Sign in to your Office 365 for business account.
Use these steps if you see this screen: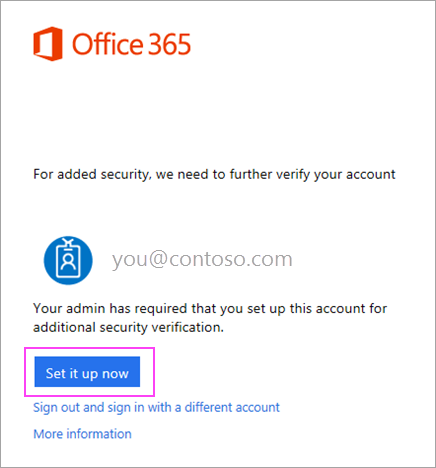
- Click Set it up now.
- Choose Mobile app from the dropdown.
- Make sure "Receive notifications for verifications" is selected. Click Set up.
Use these steps if you see this screen: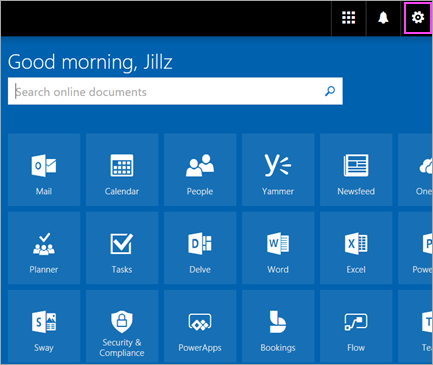
- Choose Settings > Office 365.
- Choose Security & Privacy > Additional security verification > Update my phone numbers used for account security.
- In the drop down box under What's your preferred option, choose Notify me through app.
- Check the box for Microsoft Authenticator app, click Configure.
Wait for configuration pop-up box.
You should see a window on your computer that looks like this.
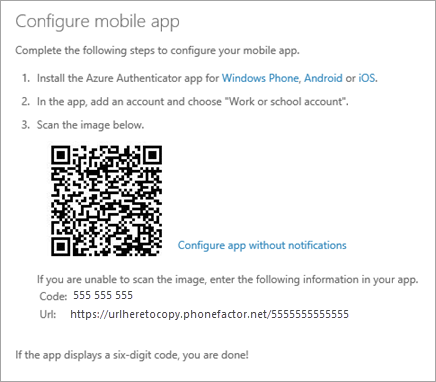
Add account to Microsoft Authenticator
- Open the Microsoft Authenticator app on your phone.
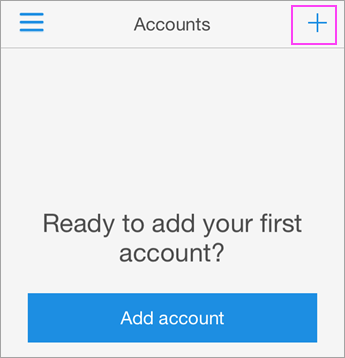
- Tap the + > Work or school account.
- Use your phone to scan the QR square that is on your computer screen.
- iPhone users may have to enable the camera in Settings in order to scan.
- If you can't use your phone camera, you'll have to manually enter the 9 digit code and the URL.
- Your account will be added automatically to the app and will display a six-digit code.
Confirm activation status on your computer
- Switch back to your computer and click Done.
- Now wait for the Checking activation status text to finish configuring your phone.
- When it's complete, you'll be able to click the Contact me button on the right.
Note: If configuration fails, just delete retry the previous steps again.
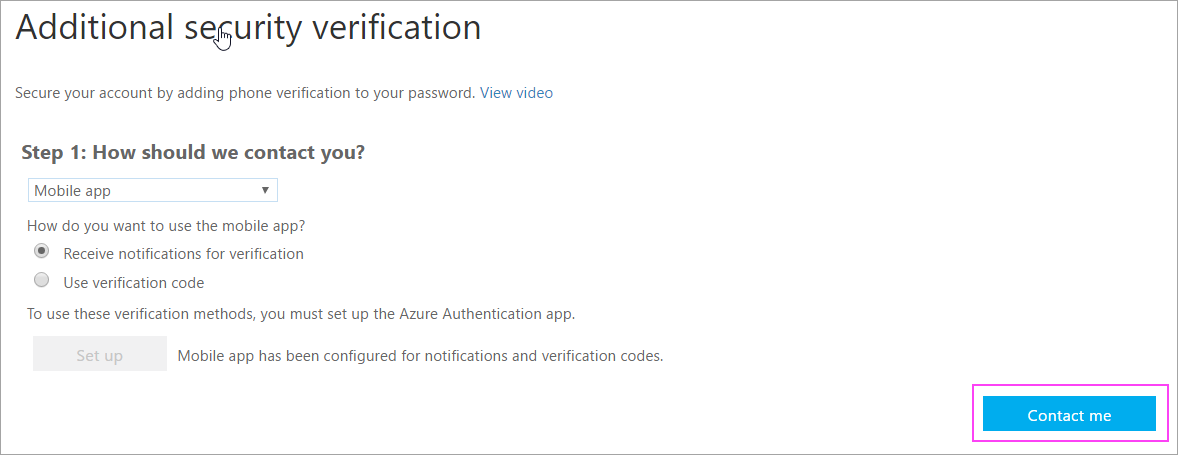
To Use Google Authenticator Or Authy etc Select “Configure App Without Notifications” and follow the onscreen prompts using your favorite authentication app
Note you can add multiple MFA types, this is good to offer resilience, however increases risk if an authenticator is exploited
Approve sign in on your phone
- Switch back to your phone and you'll see a notification for a new sign in.
- Go to the Microsoft Authenticator app.
- Tap Approve to allow it.
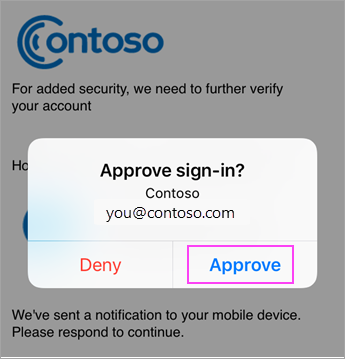
Finish set up
- Back on the computer, follow any prompts that you might see such as adding a mobile number.
- You're good to go!
From now on, whenever you have a new sign in or add your Office 365 work or school account account to an app, you'll open the Authenticator app on your phone and tap
Approve.

